
A little while ago, while taking part in an online class I discovered Light Sculpting Still Life, I wrote a post on my Still Life blog here. I discovered a few different artists creating work this way, but I was particularly struck by Harold Ross. I spent a month (well more actually) watching his tutorials, looking at his work and actually conversing with him via email. Unfortunately for me he lives in the states, but his work on Still Life and Landscapes is truly stunning.
This style of images spoke to me, in a way very differently from other types of Still Life, and it was something I was very keen to have a try, I did not have anything to re create it with.
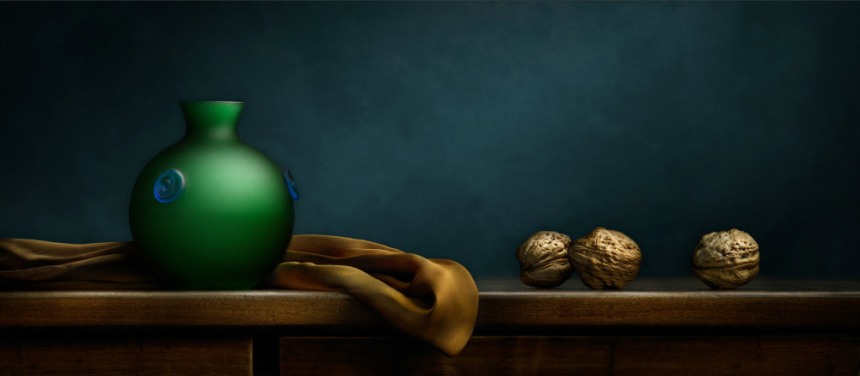
“Light Painting (or Sculpting) requires working in a completely dark studio, opening the camera for extended periods of time, and ‘painting’ the light onto the subject. This reveals greater shape, texture and colour, and is very much sculpting with light.” – Harold Ross
The system Harold Ross uses is quite expensive, he also now makes and sells his own version, also still expensive, I had no idea if I would be any good at it, it looks quite complex. So a Friend of mine (who is very clever with lights) offered to make a prototype version for me. This is it here on the left, it doesn’t look like much, but it is VERY, VERY cool.

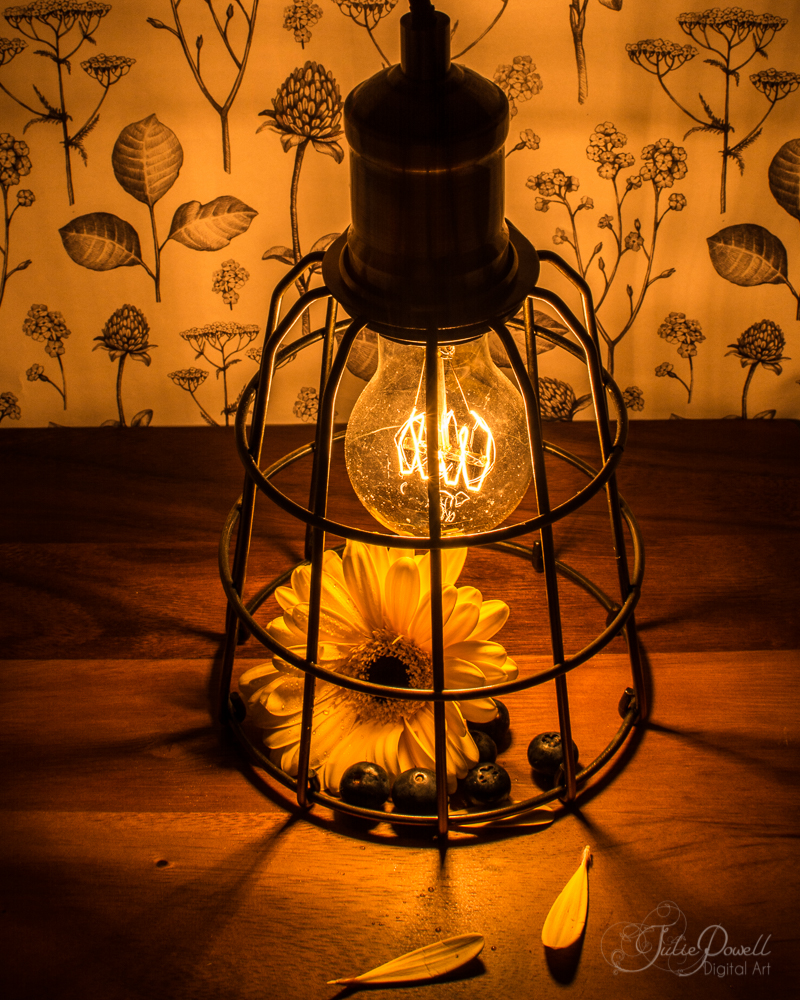
It has multiple RGB LED down one side, I can have white, seperate colours, or a combination of various LEDs.See same rose shot with various colour LED combinations, below.

I started out small and have been gradually working my way up. It can also be used in conjunction to poor natural light for a softer look.
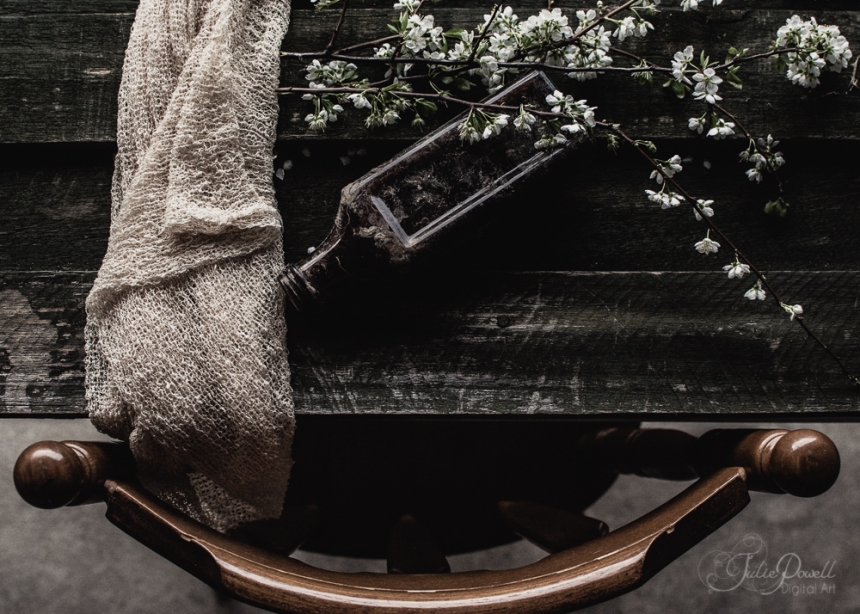
Now the images are becoming more complex, not so much as the subject, but the way it is shot and processed.

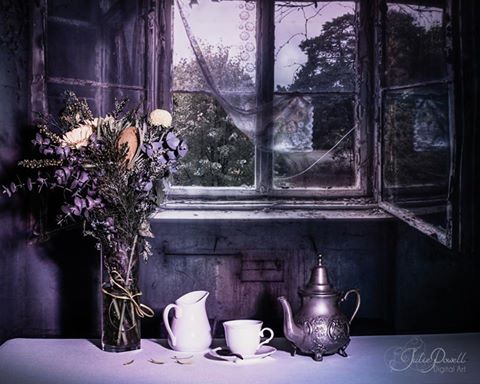

It is critical that the subject remains constant and the camera is set up on a tripod, I have a slight halo in the last image as I must have knocked the tripod during a shot. Sure I could have deleted it, but then that’s not what this experiment is all about.
Now remember you are working in almost complete darkness, so you need to first set up your shot, get your focus and then turn the lights off and play with various exposure settings. The aperture should most likely remain the same, although I did play with mine to get various different effects for DOF as well as light.I also use a wireless trigger, so as not to bump or move the camera (in theory). Because you are working in the dark and moving the light wand, it disappears from the shot, if you ‘see’ the light, then you’ve stuffed up and need to re shoot. Sometimes, like when you are after highlights you can mask the wand (or your hand) out of the shot in Photoshop.

This is what happens when it doesn’t work properly……….you can see the light
Now I know if you look at my attempts and then go back to Harold’s image they are worlds apart, but he has been at it for years and years, I have only had a few attempts……..it’s a LARGE learning curve on this one and I am also inventing a little bit as I go. I am hoping to perhaps run a workshop or two on this next year. So I better get back to it. No doubt I will post a few more images along the way. I just adore the soft, almost painterly effects you can achieve with just light.
~ Julz

I see the light!! Beautiful compostions and studies Julz.
LikeLiked by 1 person
thanks Cybele
LikeLiked by 1 person
ps whatever compostions are! 😀 (i)
LikeLiked by 1 person
oh my goodness! love love love! looks like you’ve done them for ages too 🙂 I shall, gaze on with admiration. I’d love to give it a go… but …. anyhow! yours are inspiring and that indigo blue feature one so caught my eye 🙂 cheers, Debi
LikeLiked by 1 person
Thanks Deb I am having lots of fun, but it is a big learning curve
LikeLiked by 1 person
I imagine it must be; but my eyes popped. when I saw your post come up 🙂
LikeLiked by 1 person
awwwww thanks
LikeLiked by 1 person
🙂
LikeLike
Love the effect and I think yours look great, yes I can see the difference between yours and Harolds but boy you’ll be giving him a run for his money soon 🙂 I don’t think I’d have the patience for this sort of thing!
LikeLiked by 1 person
Thanks….I hope so. Yes takes a lot of practice and patience, but so do most worthwhile things, we all start somewhere
LikeLiked by 1 person
Hi Julz! My wife Vera saw that you mentioned me in your post:-) Thank you. I’m happy to see you working with light painting. You have a very creative mind! Just a point of clarification for your readers; the lighting system that I use is actually quite cheap, and not including a torch and LED panel which I don’t make of course (less than $100), the diffusers are approximately $50! When I compare this to an average lens these days, the cost is rather affordable (this is subjective, of course).
Please keep up the good work, Julz! I’d love to see you continue!
Warmly, Harold
LikeLiked by 1 person
Hi Harold, thanks for your feedback, you are correct that compared to other lighting systems, your is comparatively cheap, and perhaps I could have mentioned pricing. However as mine didn’t cost me any more than a cup of coffee and yours is AUD$260.00 + Freight + Duties and charges, plus the torch as well, it does seem to add up. I am sure yours is far better quality and functionality than my prototype and perhaps one day I can afford it. But as I mentioned I am just starting out I had no idea if I would even be any good, so for just tinkering around in the dark and not professionally I think my prototype is very cool. One day I hope to make amazing art like yours and perhaps your system could help me achieve that, until then I am just playing. Thank you for your feedback and it is such a thrill to know you are looking on with encouraging words. If I ever visit the States, one of your workshop would be on my bucket list.
LikeLike
You are a true artist. While experimental and in the learning stage, your work is great. I could never set up a shot like yours composition wise.
LikeLiked by 1 person
Thanks Anne
LikeLike
Perfectly captured! Such talent
LikeLiked by 1 person